A personality (outcome) quiz is the type of quiz you often see at the sites like Facebook. It is clearly used more for engagement like the more advanced quizzes – not as often for lead generation (that is NOT to say it could not).
Questions at this type of quizzes do NOT have a right or wrong answer. Quiz takers answer questions and then they get a personality/persona (outcome) based on HOW they respond. These are quizzes like “Which Disney Character Are You?” and “What City Should You Actually Live In?” Basically you match each answer with one or more “personas“.
You do that for each question and if people are taking the quiz they get whatever result has the most votes. You have multiple types of questions and answers – including images – to choose from. DilogR team created a wizard that walks you these different steps when you create a (simple) personality quiz.
Below are the steps:
Quiz Title
Background
Personas
Questions
Lead Capture
Quiz Results Page
Social Sharing Settings
Start Page
Integrations
Distribute Quiz
Analytics
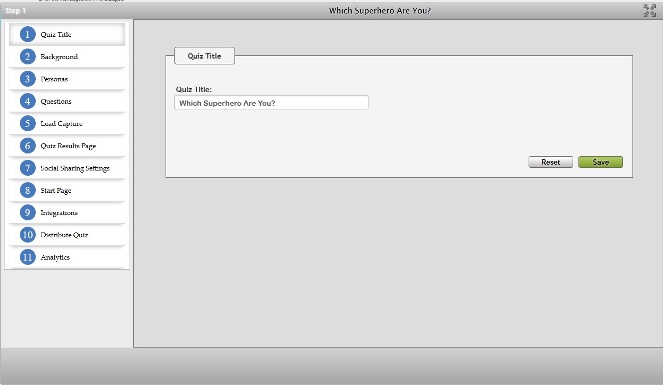
STEP 1: QUIZ TITLE
You see the 11 steps on the left side bar. The first step is to name your quiz.
You will find your quizzes among “my projects” by this name.
Our sample – and very simple – quiz title is “Which Superhero Are You? “
Your quiz takers will see this same title.
SAVE - NEXT STEP
STEP 2: BACKGROUND
Select your background type
You can pick one of the default colors for background or use the color picker to select your own color. Or use an image.
Upload a background image or select from one of your previously uploaded images
In this particular quiz we chose to use UPLOAD AN IMAGE for the background.
You can crop the image once you upload it.
Do NOT forget to SAVE

STEP 3: PERSONAS (outcomes)
Remember, your questions at this type of quizzes do NOT have a right or wrong answer. You are not giving scores.
Quiz takers answer questions and then they get a persona/personality (outcome) based on HOW they respond. You might be quizzing whether someone is certain type of personality, whether they have certain ambitions, skillsets, symptoms etc
You need to create your “List of possible Personas” (outcomes)
+ and – allows you add and remove personalities/outcomes.
Do NOT forget to SAVE

STEP 4: QUESTIONS
You have multiple types of questions and answers – including images – to
choose from.
Choices for answers are:
Multiple choice – select one
Multiple choice – select all that apply
Multiple choice – image answers
One choice – image answers
Yes/No
True/False
Long answer
Question Lead
In this first question we choose to ask “What would you eat for breakfast?”
We require an answer for the first question (=you must reply to continue).

We also chose to REQUIRE an answer (see below additional options)
You write your question in the text box – and you have quite a bit of ability to edit that text.
Additional options:
Require an answer for this question
Randomize answer choices for each respondent
Include a “continue” button that people click to go to the next question
Display image under question text – this will make the image larger [You do NOT need to use this option below for this type of quiz. You can also choose whether you show the correct answer either after each question or at the end of the quiz
Then we MUST ASSIGN a persona we created in step 3 to each answer option.
Example: Eggs – superman would eat eggs.
As you notice the same answer option can be assigned to multiple personas.

Above the correct answer you see “No redirect link set”.
You see an option on the right “ADD REDIRECT”

[If you click on “CORRECT ANSWER” below each answer option (On the left) a text box opens that allows you to provide feedback – up to 200 characters.]
You also see signs for + and – on the right to add/remove answers.
Note: when you come first time to this page you see under “Add New question” – once you click on it the page changes to see all you see in the screenshot below.
At the bottom of the page you can select:
Choose the alignment for the next button
Left Center Right
Display a “Back” Button
No Yes
Continue Button Text:
Back Button Text:
We also have a second sample question “Where would you vacation?” (multiple choice question – where we add an image to the question)
DILOGR TIP: if you have chosen to use question type where people are allowed to selecl all that apply you MUST have the NEXT (continue) button. There is no say the software can read your mind and tell how many choices you select.
STEP 5: LEAD CAPTURE FORM
If you want a lead capture form, turn that switch "ON", if you don’t want a lead capture form keep the switch “OFF” and move on to the next step.
1 - select where you would like to display your form.
At the end of the personality quiz
At the beginning of the personality quiz
Do not include lead capture form (keep responses anonymous)
2 - Click below to edit the lead capture text and buttons.
NOTE: we are not even using the screenshot for the bottom of the page for lead capture step.
However, it is similar for for the simple scored quiz.
3 - Lead Fields (limit 20).
4 - Advanced:
Hide opt-in form if form fields are present in URL Paramater
Add a skip button to the lead capture form.

Do not forget to SAVE!
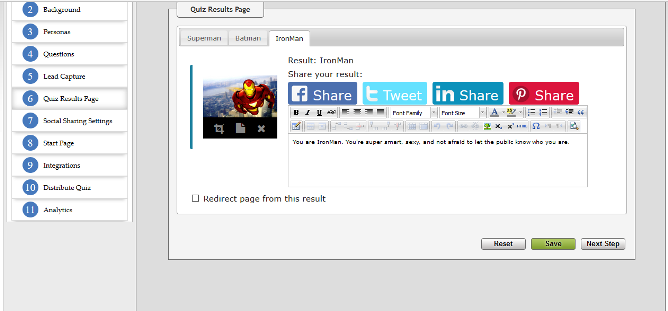
STEP 6: QUIZ RESULTS PAGE
The results page relates to PERSONAS in Step 3. In this “What superhero are you” quiz example we had results such as:
Superman – Batman – Ironman
You can make those pages “prettier” with images attached to each one of them.
You can also include detailed descriptions, links, videos etc You have a power editor to format your text as you want to.
In addition, you may:
Redirect page from this result
STEP 7: SOCIAL SHARE SETTINGS
After a person takes your Personality Quiz you can give them the option to share their result with their friends on social media.
The share icons will appear on the “Thank You Page” that is shown upon completion of the Personality Quiz.
Use this section to setup the “Share Your Result” options.
Select which share buttons to enable on the “Thank You Page ” (if you don’t want to allow sharing, leave the buttons unchecked)
Facebook Twitter Linkedin Pinterest
Check to enable social sharing on quiz front.
Advanced options
Enter the URL where people will take your Personality Quiz. If you are using the DilogR Personality Quiz page (microsite), just leave this setting as it is.
If you are embedding the quiz on your website or another page, enter the URL of the page where you are embedding the quiz.
As you likely want to post the quiz score or the segment name on the social media posts, make your selection on this page as well,
Share URL: http://dilogr.com/app1/v/3509a2bd75592fe
Share title: I Got “~HighestPersona.Name~” on “~Project.Headline~”. What about you? .
Preview Social Media Posts
You can also select persona to preview.
*On LinkedIn posts we cannot always control which image is posted. LinkedIn will select an image from the URL of the page you are sharing.If you are sharing a page from your site where the quiz is embedded LinkedIn may use different images from your site for the post image.

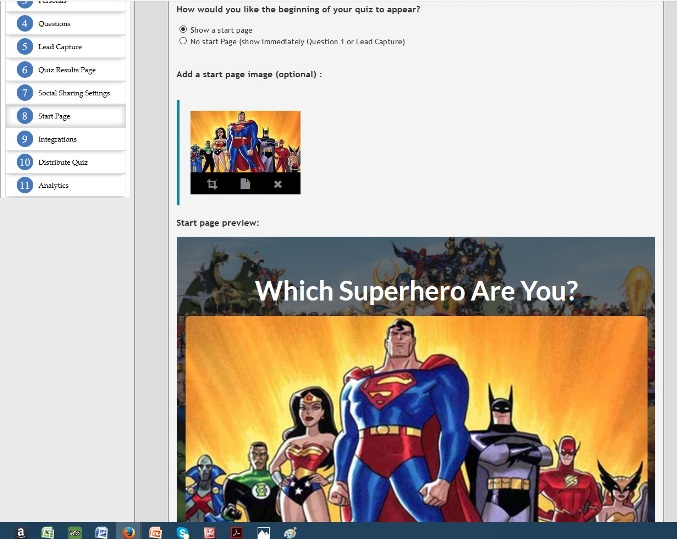
STEP 8: START PAGE
Start page allows you to choose how you would like beginning of the quiz appear – with a start page or no start page (showing question 1 or lead capture).
You can also add an image (optional).
How would you like the beginning of your quiz to appear?
Option 1: Show a start page
Option 2: No start Page (show immediately Question 1 or Lead Capture)
Do Not forget to SAVE.
TIP:
Preview Settings
Preview your quiz without answering required questions. ( Only for preview mode )

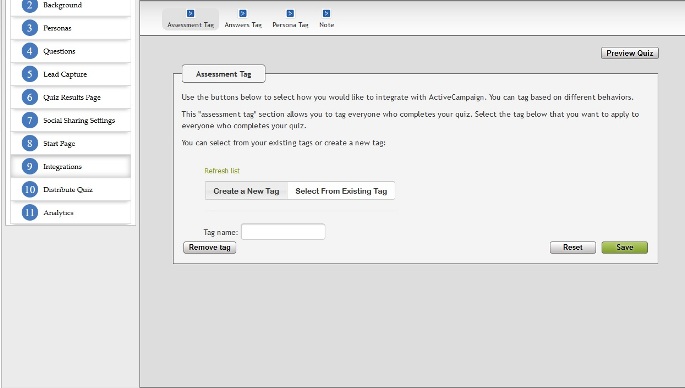
STEP 9: INTEGRATIONS
If you would like to integrate your quiz with an email provider, marketing automation system, or CRM system click “Select Integrations” and choose which systems to integrate with. If you don’t want to integrate with other systems click “Distribute” to distribute your quiz.
For example:
Use the buttons above to select how you would like to integrate with ActiveCampaign. You can tag based on different behaviors.
This “assessment tag” section allows you to tag everyone who completes your quiz. Select the tag below that you want to apply to everyone who completes your quiz.
You can select from your existing tags or create a new tag
Name the tag
STEP 10: DISTRIBUTE QUIZ
As soon as it is published you are ready to share it with the world. You get the embed code that you can use to post the quiz on your site. You can see a preview what the quiz will look like when it is embedded. Of course the quiz is also responsive so it looks stunning on any device.
Even after it gets published you can always go back and edit it if you decide to make any changes.
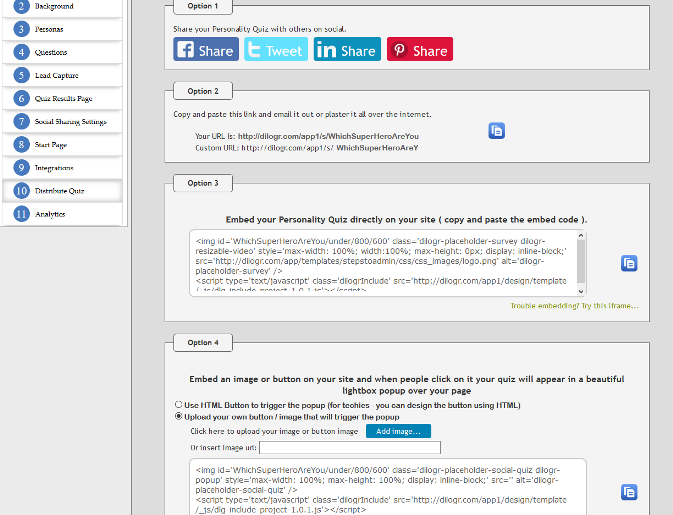
Option 1: Share your Personality Quiz with others on social.
Option 2: Copy and paste this link and email it out or plaster it all over the internet.
Your URL Is: http://dilogr.com/app1/s/WhichSuperHeroAreYou
Custom URL:
Option 3: Embed your Personality Quiz directly on your site ( copy and paste the embed code ).
Option 4: Embed an image or button on your site and when people click on it your quiz will appear in a beautiful lightbox popup over your page
Publish in Affiliates
In addition to normal links, banners and email promos, your affiliates can embed tagged DilogR videos directly on their site to generate qualified affiliate tagged leads for you! Simply choose which platform you’ll be using for your affiliates.
Change Project Type
Do Not forget to SAVE.
STEP 11: ANALYTICS (STATS)
Soon as the quizzes are out in the world you can track the stats.